Monday, August 06, 2007

Butternuts=golden brown


This is a butternut. A sticky, smallish nut that grows on butternut trees, of which we have several, and I collected almost a dozen of them for the dyebath. According to what I read, the green hulls are what you are after, but I had almost 2/3 of the nuts that had browned up on the ground before I collected them, and it still seemed to work just fine.


I soaked them for a day, then simmered for an hour. I used our tap water, which contains iron, but in this case the effect was to intensify and darken the color, which was fine with me.


I strained out the nuts and nut debris, and simmered the wool yarn in the liquor for a hour or so. It took the color almost immediately, and this time the bath seemed to exhaust, leaving a very light liquid behind, so I didn't bother trying to save it for another go, although the directions state that you should try again with the saved nuts...


And....viola! This nice color is going to be a pair of socks for my awesome brother-in-law.


Monday, July 16, 2007

Summer projects


Summer has arrived, and that means lots of opportunities to experiment with more natural dyes. Plus my brother is here from Japan, and that also means lots of tips, techniques, and of course, commentary.

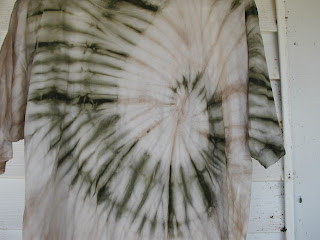
He showed me how to tie up a shirt for the swirl effect. My first attempt was OK, but I didn't have the right plastic string, so we made do with cotton. We wanted to try birch bark, which was rumored to give a pinkish color, but despite following the directions, all we got was a brown. And a light one at that. The green comes from Rudbekia (Black-eyed Susan) flowers.

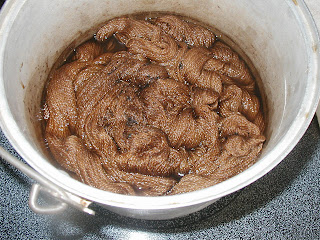
We started with a plastic grocery bag about half full with flowers. We poured a gallon of boiling distilled water (we have iron in our water) over them, and let them steep overnight in a stainless steel dyepot. The next day, I simmered the flowers with enough added distilled water to cover the flowers, for several hours. (BTW - stinky!) I let that cool and sit over night. Actually two nights. And then the cotton t-shirt came out of the other dyebath into this one, as more of an experiment than anything. The bark had not yielded the hoped for result, so I chalked the shirt up to a zero already...so no harm done.

It had been simmered in the bark, cooled, dipped in alum mordant (alum dissolved in more distilled water) and simmered again, then allowed to cool again. Nothing really interesting came from that. (Hence the weak tan color opposite the green swirl...)

The resulting green on the shirt after two days soaking was pretty nice. A deep bottle green. At first glance, the brother assumed the green was a result of iron influence (expecting more of a yellow green with all those yellow blossoms). He said soaking the shirt in the alum mixture in a old pot as we had might have released a bit of iron to the shirt, and he says it doesn't take much...

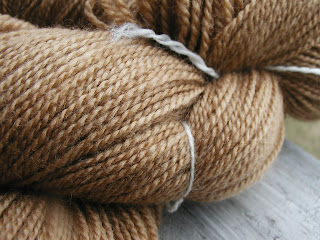
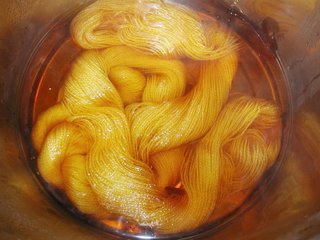
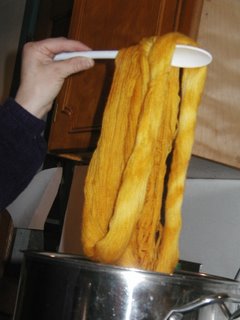
Well, happy with the color, I decided to experiment with a skein of superwash wool. (Sock yarn, what else?) So I put the skein in the Rudbekia liquor, and was disappointed to see a brownish color. Wanting to test the iron-in-the-water-makes-green theory, I took the skein out of the dyepot, got it wet in tap water, squeezed, and returned it to the stainless steel dyepot with the Rudbekia liquor. I added gentle heat, and occasionally stirred the yarn to even out the application of color.


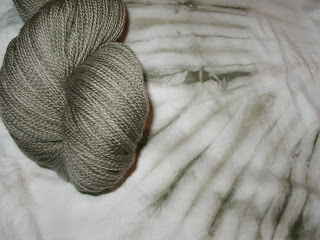
While happy with the olive green I got, there's obviously more to the whole mysterious process. My addition of a tap water (iron) rinse got the dulling of color the brother predicted, which means for now, the greener color on the shirt was not due to any iron mishap with the old pot, but rather the intensity of color one can expect with that large amount of blossoms.
Next: repeat the experiment and try for the greener rather than olive.

Sunday, February 04, 2007

Onion skins

I would have never thought something so simple as onion skins would produce a color so "happy" as what I got...but it was spectacular. And simple. We LOVE simple.

Lots of dye books and websites tell you the colors you can expect from onions, and some suggest different mordants, but when it came right down to it, almost none of them tell you the step-by-step directions on HOW to do it. Sure, it's simple if you KNOW how to do it....but how about directions for the rest of us?

First, I was worried about colorfastness. What I read suggested onion was, by itself, pretty decent, but I wanted insurance. So I pre-soaked the merino superwash in alum water. (I had previously dissolved alum in water for use an another dye project, and they suggested saving the water with its trace amounts of alum to start the recipe the next time.) So I wetted the yarn in the weak alum solution, and was relieved to see almost no residue or color to the yarn. I was worried, as the alum water had darkened over time...

So then I used the same alum water, about 4 cups, in the dye pot. I added an additional 4 cups of tap water (and we have some iron in our water) and three large handfuls of collected skins from yellow onions.


I brought this to a boil, and then turned down the heat and let it simmer for about 45 minutes. Then I removed the bulk of the onion skins with a spoon, and put it the yarn.


Just from the way it is sitting in the dye pot, you can tell there will be variations in the intensity of color, and that's fine with me. I let it sit for about 20 minutes, and then took it out and gently squeezed the excess dye liquid out...


Even here you can see the variation in intensity of dye. I'm sure if I had stirred it around, I could have achieved a thorough coloring of the intense yellow seen to the left.

This gorgeous hank dried overnight and was wound on the noddy, and secreted away to the stash, to be used on (what else?) socks. Saved for one of the more intricate patterning socks, where our usual variegated colors would hide the pattern work from all but the really curious. And frankly, I don't want people that close to my feet...

Monday, November 27, 2006

Fleece dyeing


OK, not anything like yarn dyeing (so I learned). I processed a small amount of Shetland fleece for a thrummed mitten project (see the farm blog) and laid it out and simply squirted the acid dyes over the fleece.

You can see that with the squirt bottle (vs. painting) the coverage is random and inconsistent. The wool was showing its wicking properties very well. Grrr.

I think part of the issue was the small amount of fleece and the processing method. With such a small amount, there was no hand carders or drum carding, simply flicking it open, and combing gently with fingers for cleaning purposes. That left very open fiber, and hence....you can see the pooling.

The amount of dye that did not take to the wool was alarming; blotting took up a ton more than we do when we use the wool yarn, and even upon rolling up the fleece to steam set, you can see the dye settling to the bottom. Good thing I used plastic both above and below the fleece so the rolled fleece could not touch back on itself and spread dye through contact.

Finally, into the pot....and then to dry. Now to start the mittens...

Thursday, November 02, 2006

In the beginning....


...there was (some) color. Well, actually, not ENOUGH color. Particularly on sock yarn. So an off-handed comment about starting our own sock yarn company, landed us here. You can get the whole, sordid tale if you follow along, or you can skip to the end and just order yarn. But what fun would that be? Without knowing all that came before you got your custom, hand-dyed yummy skein of sock yarn?